Picture this. You build a simple bookshelf for your garage. Everything lines up until the final shelf sags. Why? A fractional misread on your tape measure threw off the cut by 1/16 inch. These small errors waste time, money, and materials. They frustrate beginners and pros alike.
Most tapes mark in 1/16-inch steps. Finer ones go to 1/32. You can master them fast. This post breaks down markings, shows reading steps, offers practice, and covers pitfalls. You’ll gain confidence for any project. Follow along, and measure like you mean it.
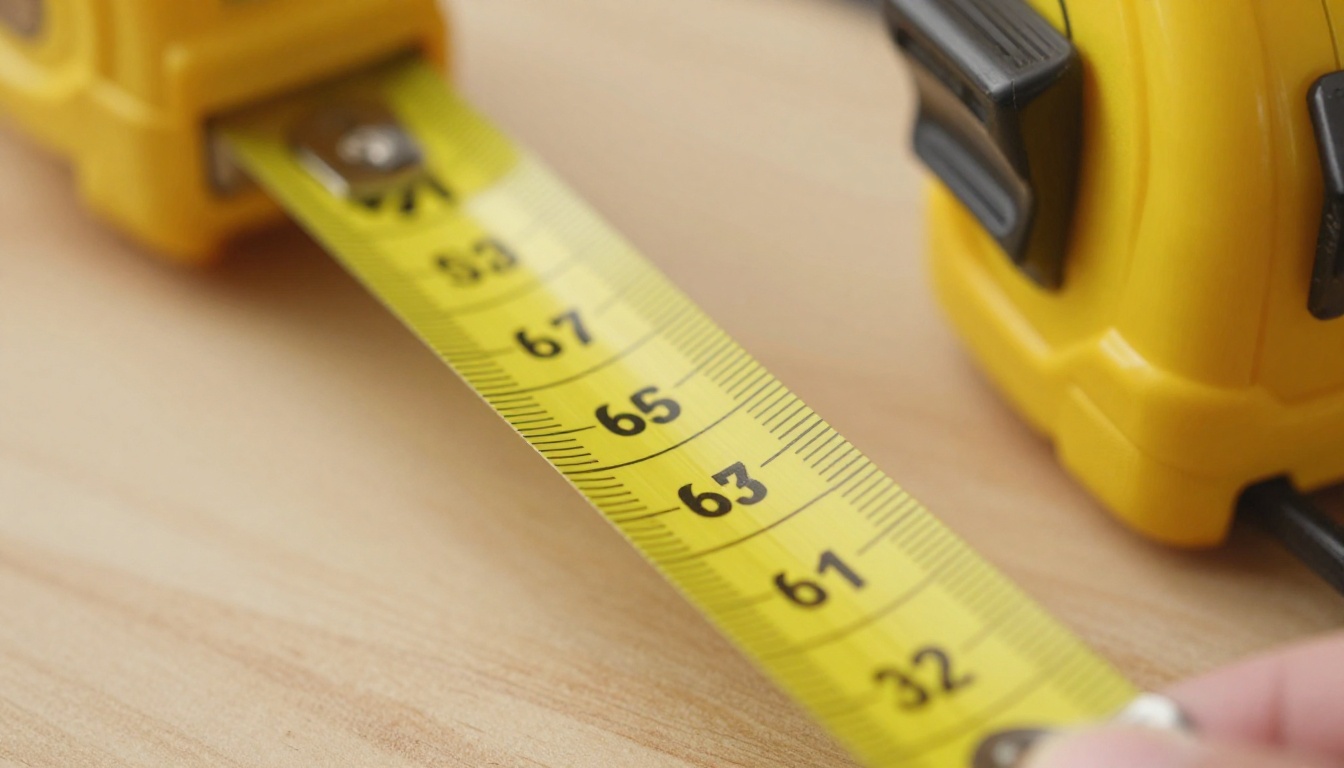
Break Down the Markings on Your Tape Measure
Grab your tape. Pull out the yellow blade. Notice the lines and numbers right away. Longest lines match bold inch numbers printed above them. Every 12 inches, a thicker red or black line marks a foot. Builders love these for quick framing checks.
Fraction lines fill spaces between inches. They vary in length. Shortest ones mean smallest units. Longer ones show bigger fractions. Also, spot red stud marks at 16 and 24 inches. They help with wall layouts.
The end hook grabs edges. It slides a bit. That play ensures true inside and outside reads. Hook it firm for outsides. Push it flush for insides.

For more on tape features from a top brand, check Stanley Tools’ tape measure guide.
Spot Inch and Foot Lines First
Start here every time. Inch lines stretch longest. Black numbers sit above them. For example, the “3” means three full inches from zero.
Feet get special treatment. Red blocks or double lines signal them. They often say “1 FT” or just show 12. Align the brass hook dead even with your start point. Zero marks the beginning.
Pull straight. No curves. This keeps lines true.
Decode the Fraction Lines Step by Step
Each inch holds 16 tiny lines on standard tapes. One tiny line equals 1/16 inch. Count two? That’s 1/8 inch. Four tiny lines make 1/4 inch. Eight hit 1/2 inch.
Longer lines label bigger fractions. Half-inch lines nearly match full inches. Some tapes number them: “1/4” or “1/2.” Always count from the last full inch line. Skip numbered spots if clear.
Practice slows you down at first. Speed comes later.
Read Any Measurement with Confidence
Extend the tape taut. Keep it level with your eye. This avoids slant errors. Read from left to right always.
Feet first if shown. Then inches. Finally, fractions. Say the full thing out loud. It sticks better.
Convert if needed. Three 1/16 lines equal 3/16 inch. Group them: two lines make 1/8, plus one more.
Handle Whole Inches and Feet Easily
Spot feet blocks quick. Say past one foot mark, the bold “2” shows. That reads one foot and two inches so far.
No feet? Jump to inches. Between “5” and “6,” you’re at five inches plus fractions ahead. Pull tight. Note the number closest before fractions.
Examples build habit. Try on scrap wood now.
Add Fractions Without Confusion
Begin count at the last inch line. One short line past it? 1/16 inch. Two shorts? 1/8 inch. Three? 3/16 inch.
Group for ease. Four shorts equal 1/4. Eight make 1/2. Most tapes label these. Still count to confirm.
Say it: “Seven sixteenths.” Your brain locks it in.
Put It All Together in One Read
Combine everything. Suppose feet mark at 4. Inch reads 7. Past that, five tiny lines.
Result: 4 feet, 7 and 5/16 inches. Write “4′ 7-5/16″”. Repeat twice. Measure back to check.
Do this often. Precision follows.
Work Through Practice Examples to Build Skill
Hands-on beats theory. Pause here. Get your tape. Measure a book or board. Match these next.
First example: Pull to halfway between 1 and 2 inches. Long line there? One and 1/2 inch.
Second: Two feet past start. Inch at 3. Seven tiny lines after. That’s 2 feet, 3 and 7/16 inches.
Third: Finer tape at five inches. Three tiny and one half-tiny line. Equals 5 and 5/32 inch.
Fourth: Flip to metric side. Many tapes show centimeters too. Ten millimeters make one centimeter. Easy switch.
Repeat each. Time yourself.
For printable practice tapes, see Family Handyman’s measuring worksheet.
Easy Starter: Half-Inch and Quarter-Inch Reads
Halfway mark stands out. Thick line between inches. Quarter sits at four tiny lines or labeled.
Test it. Mark 1/4 past two inches. Cut a test piece. Check with ruler.
Trickier Sixteenths and Thirty-Seconds
Seven tiny lines? 7/16 inch. Group: 1/2 minus 1/16, or count straight.
1/32 tapes double short lines. One single short plus one double? 3/32 inch. Slow count wins.
Dodge Common Errors for Spot-On Results
Mistakes sneak in. Tape bends. Hook wiggles. Light fades lines. You rush the count.
Fixes work. Stand square. Double measure. Light it up.
Common slips cost projects. Avoid them now.
Fix Parallax and Alignment Issues
Parallax shifts reads. Your eye off-line sees wrong by 1/16 inch easy.
Kneel or stand so eye sits direct above tape. Sight down the blade. Lines square up true.
Overcome Hook Play and Slack Traps
Hook rocks 1/16 inch. Outside pulls it out. Inside pushes flush.
Account for it. Butt hook tight always. Slack adds fake length. Yank firm.
Sharpen Counts on Busy Markings
Crowded lines confuse. Start fresh from inch line each read.
Trace with finger. Or mark with pencil. Count aloud slow.

Extra Tricks for Measuring Like a Pro
Lock the blade. Button holds it steady. Jot totals in a notebook.
Pick clear-printed tapes. Stanley or Lufkin shine. Apps convert fractions, but practice hands-on first.
Curve the tape over corners. It hugs edges better.
For tape recommendations, browse Lowe’s guide to best measuring tapes.
Nail Every Project with Fraction Precision
You now know markings cold. Count steady from inches. Practice turns shaky reads sharp.
Grab your tape today. Measure that shelf or frame. Nail it perfect.
Share your first win below. What project calls next? Hit subscribe for more shop tips. Precision builds pride.