Picture this: You’re a woodworker rushing to finish a shelf project. You measure a long 2×4 carefully, mark it, and cut. But the board comes out an inch short, scrap wood piles up, and hours vanish along with your budget.
That’s a parallax error at work. It happens when your eye isn’t directly above the measuring tape, so the mark shifts slightly from your viewpoint. Long boards like 2x4s or plywood make it worse because they twist, sag, or bow under their weight.
Don’t worry, though. You’ll learn easy fixes ahead, from eye-level tricks to smart tool choices, for dead-accurate cuts that end the frustration. First, let’s spot the common causes.
Grasp How Parallax Error Creeps into Long Board Measurements
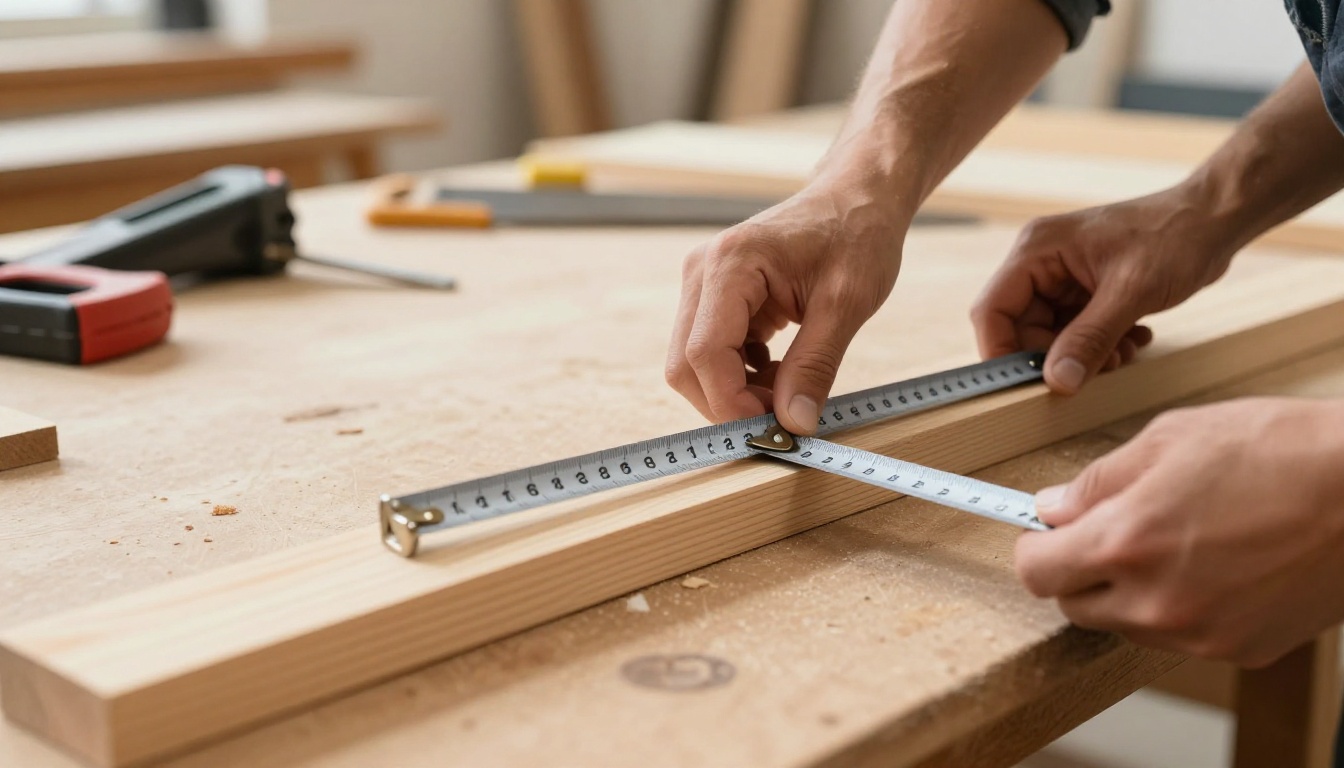
Parallax error sneaks in when your eye sits off to the side of the measuring tape. Think of a ruler on your workbench. View it straight down, and the marks line up perfect. Tilt your head, and they shift like a magic trick. You see the same with a car’s speedometer from the passenger seat; numbers jump around because your angle tricks you.
Long boards crank up the trouble. They flex under their own weight, so keeping them flat takes effort. Your eye drifts over those spans, and small angles turn into big gaps. Boards bow or warp too, which pulls the tape off true.
The fix boils down to this: Position your line of sight perpendicular to the tape scale. Right above the mark, no side glances. Signs show up fast. Repeat the measure three times, and numbers vary? Cuts refuse to join snug? Parallax struck.
Those slip-ups hit hard. Here’s what they cause:
- Wasted lumber stacks up because boards end too short or long.
- Joints gap or overlap, forcing rework and glue fails.
- Projects drag on, eating hours you can’t get back.
- Frustration builds, turning fun builds into headaches.
Spot and stop it now. Your cuts fit right, boards save, and shelves stand proud. So how does it creep into long boards exactly?
Spot the Sneaky Causes Specific to Long Boards
You fight this error head-on with long boards. First culprit: board warp. A slight curve lifts the tape uneven, like a bowed bridge sagging in the middle. Your eye catches a false line.
Next, you stand too far back over long spans. Distance stretches the angle, so the mark wanders. Poor lighting hides it worse; shadows blur the true edge.
Tape sag pulls heavy too. Stretch it tight across 8 feet, and it droops like a clothesline after rain.
Quick checks beat these every time. Lay the board flat on sawhorses first. Pull tape firm, then crouch eye-level. Shine a light straight down. You win.
Real-World Examples of Measurements Gone Wrong
Take Mike, a carpenter building garage shelves. He eyed the tape from the side on 10-foot 2x4s. Marked, cut, and installed. Shelves sat 1/4 inch short. Boards wobbled, supports failed. Parallax shifted his view just enough over distance.
He remeasured eye-direct. Cuts matched perfect. Joints locked tight now.
Or picture Sarah’s DIY deck. She gauged rail boards standing back. Mismatch hit: rails overhung by 1/4 inch. Gaps showed ugly, safety risked. Side-angle parallax lied on the saggy tape.
She flattened boards, got eyes overhead. Rails butted flawless. Deck shines strong.
These hits repeat until you adjust.
Position Yourself and the Board for Flawless Alignment
You can kill parallax errors by lining up your eye and the board just right. Keep your sight perpendicular to the tape at 90 degrees, like staring straight down a gun barrel. Boards stay flat and supported. You save hours on bad cuts. Start with your stance and setup.
Prep your workspace first. Clear debris from a level surface. Use natural light or an LED overhead lamp. Shadows vanish, marks sharpen. Support the board every 3 feet with sawhorses. Bend your knees for a steady crouch. Helpers shine on 12-footers; one holds the end while you mark.
Pro tip: Mark your eye height on a shop wall with tape. Check it matches your crouch each time.
Eye-Level Hacks That Anyone Can Master
Crouch low until your eye sits directly above the tape mark. No side tilts allowed. Your brain fools you otherwise.
Try these simple hacks:
- Crouch to eye level: Drop your knees. Lean in close. Sight the mark from straight above.
- Mirror side-check: Place a small mirror behind the tape. Peek for off-angle views. Adjust until it lines true.
- Phone level app: Open a free bubble level app. Hold it perpendicular to the tape plane. Green light means go.
Practice this drill: Pick one spot on a 8-foot board. Measure it three times from different angles. Note the differences. Repeat until all read the same. You build muscle memory fast.
These steps cut measuring time in half. No more do-overs.
Stabilize Long Boards to Keep Tape Honest
Flat boards tell the truth. Sag or bow, and tape lies. Roller stands or sawhorses hold them level. Space them 3 feet apart.
Clamp the tape hook to the board end. Pull firm but not too tight; overtension curves the tape. Check for droop in the middle.
Solo measuring works for 8-footers. Hold one end under your arm. Pin the board down. Team up for longer runs. One person anchors zero, the other marks. Calls stay clear.
Compare the two:
| Setup | Pros | Cons |
|---|---|---|
| Solo | Quick setup, no coordination needed | Harder on 10+ feet, arm tires fast |
| Team | Steady hold, accurate over distance | Needs extra hands, slight communication lag |
Teams win on big projects because ends stay put. Solo saves when you’re alone.
Clamp and support first. Your tape hugs true. Cuts match every time.
Pick Tools That Banish Parallax Errors for Good
Tired of fighting your eyes every measure? Grab tools that sidestep the angle problem completely. They read distances without you squinting over a tape. You get fast, spot-on numbers every time, especially on those heavy long boards. Let’s break down the best picks and how to use them right.
Upgrade to Digital and Laser Measures
Lasers zap away eye tricks. They shoot a beam to the board end and bounce back a precise dot. The readout shows the length on screen, no line-of-sight guesswork. Digitals work the same way. LCD displays spit out numbers straight, so your head angle doesn’t matter.
Start with laser distance finders for speed on 8- to 20-foot boards. Bosch and DeWalt make solid ones, but shop smart for generics too. They hit 1/16-inch accuracy over 50 feet, perfect for spans where tapes sag. However, they cost more upfront. Budget options under $50 pop up often; check current deals for no-name models that still deliver.
Digital calipers shine for board ends. Slide jaws to grip edges, read microns if needed. No tape hook wobble. Straight edges with built-in levels confirm flatness first, then mark true.
Setup stays simple:
- Power on and zero the tool at your board’s start.
- Hold steady, aim the laser dot or jaws firm.
- Read the display, double-check against a known length.
Calibrate often. Test against a steel ruler weekly because dust or drops throw them off. Stick with tapes for rough outsides or curves. Lasers rule straight runs.
By 2026, app-connected versions link to your phone for blueprints. They save measurements digitally now.
Here’s a quick comparison:
| Tool | Accuracy | Max Range | Avg Price | Best Use Case |
|---|---|---|---|---|
| Laser Finder | 1/16 inch | 50+ ft | $30-150 | Long straight boards |
| Digital Caliper | 0.001 inch | 6-12 in | $15-40 | Precise end measurements |
| Level Straight Edge | Visual check | Any | $10-50 | Flatness before marking |
<image_generation_card id=”4a7b2c1d” query=”Woodworker in workshop using handheld laser distance measure on a long 2×4 board supported on sawhorses, clear red laser dot at board end, digital readout visible on device screen, natural workshop lighting, realistic photo style” size=”MEDIUM” position=”CENTER”></image_generation_card>
These cut errors to zero. For example, pros on Bosch laser measure reviews praise the GLM20 for woodworking reliability.
Enhance Your Tape Measure Game
Don’t toss your tapes yet. Upgrade them instead. Pick wide, rigid blades at least 1 inch across. They resist sag on 10-footers better than skinny ones. Bold, clear markings stand out under shop lights, so you spot the line fast.
Look for true-zero end hooks. They slide just right for inside or outside measures, keeping zero spot-on without math. Stanley and Lufkin offer good ones, but any brand works if the blade stays flat.
Add your own tweaks for parallax-proofing. Glue a small bubble level to the case top. Sight the bubble green while you pull tape. It confirms you’re perpendicular without crouching extra.
Other smart picks include:
- Vinyl-coated blades that grip wood without slip.
- Magnetic hooks for steel if you mix metals.
- Extra-long cases for better one-hand control.
Test new tapes right away. Stretch across a known 8-foot span. If it matches, you’re set. These changes cost little but save wood and time. You’ll measure solo on long boards without helpers now.
Follow This Step-by-Step Routine for Perfect Measures Every Time
You know the pitfalls now, from eye tricks to saggy tapes. Combine those fixes into one tight routine. It works on any long board, whether 8-foot 2x4s or plywood sheets. Repeat it every time, and parallax errors vanish. Your cuts match perfect, projects snap together fast.
Start here. Prep takes seconds but pays big. Then mark with confidence.
- Prep the board flat. Set it on sawhorses spaced every 3 feet. Clamp ends down. Check for bow with a straight edge; shim if needed. Flat boards lie straight.
- Align your eye over zero. Crouch so your sight hits perpendicular right at the tape start. No side lean. Use a mirror behind if solo.
- Pull tape taut without sag. Hook the end firm. Stretch smooth across the span. Watch the middle; add support if it dips.
- Mark boldly. Sight straight down at your cut line. Use a sharp pencil or knife. Press twice for a thick line.
- Double-check from a new angle. Shift 6 inches left or right. Does the mark line up? Adjust now.
- Measure reverse. Flip the board end-to-end. Pull tape back the same length. Marks should match dead on.
That’s it. Six steps, under two minutes. You build speed fast because repetition sticks. Meanwhile, boards stay true, cuts fit snug.
Double-Check Tricks to Catch Errors Instantly
Steps done? Don’t stop. These tricks confirm everything instantly. They catch the sneaky shifts you miss first pass.
Reverse measure stands out first. You already do it in step 6. But go further: note both marks. A half-inch gap screams parallax.
Overlap two tapes for super long runs. Say 16 feet. One person holds zero to 8 feet. The next overlaps 6 inches. Add the reads, subtract overlap. Numbers match your first measure? Good to cut.
Bring in a buddy for confirmation. They sight from your eye spot while you hold tape. “Line up?” they call. Two eyes beat one every time, especially under dim lights.
Run a math check last. Break the board into halves or thirds. Measure each part. Sum them up. Does it equal the full length? Off by 1/8 inch? Recheck your pull.
Quick troubleshooting keeps you rolling:
| Problem | Fast Fix |
|---|---|
| Marks don’t match | Reposition eye directly overhead; add bright light. |
| Tape sags middle | Support with a roller stand or helper hand. |
| Reverse off by 1/16 inch | Flatten board more; re-zero hook. |
These hit common slips. For example, dim shops fool most. Shine an LED down, shadows flee.
Practice seals it. Build a simple picture frame from 1x2s. Cut four 24-inch sides. Dry-fit corners. Gaps show your weak spots. Nail it tight, hang proud. Confidence surges after one build. You measure long boards solo now, no sweat.
Stick to this. Errors drop to zero. Projects finish quicker, wood saves.
Conclusion
Master eye alignment, solid board setups, and smart tools to crush parallax errors when measuring long boards. These steps keep your tape true and cuts spot-on. You save wood and time every project.
Pick one tip today, like the crouch trick or laser measure. Try it on your next board. Share your results in the comments below; let’s swap shop wins.
Subscribe for more shop hacks and grab our free measuring checklist now. No more mystery short boards!